


Glass sands with ordinary sandpaper — provided the paper is silicon carbide and the work stays wet. Silicon carbide is harder than glass and fractures into fresh sharp edges as it wears, so it cuts cleanly instead of skidding; water carries the sharp debris away and holds friction heat down, and that combination is what actually prevents chips. Start at 120 grit to shape an edge, 220 to 400 on surfaces, and take both to 1000 or finer before any polishing. This page gives the two grit ladders, the technique that keeps edges intact, and the jobs where sandpaper is the wrong tool entirely.
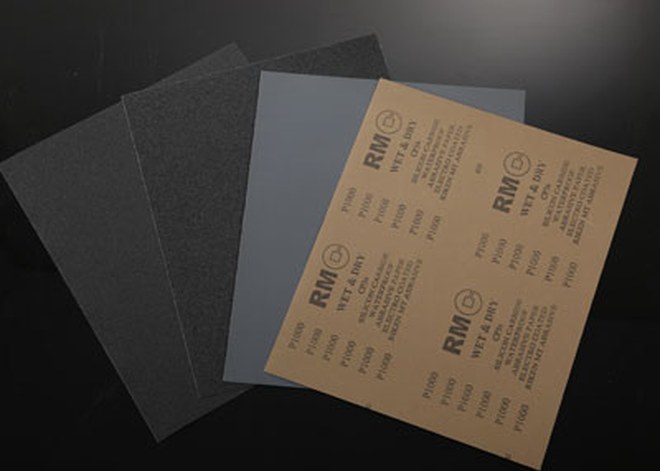
Use silicon carbide wet-and-dry paper — the waterproof backing is what lets the paper survive soaking — and keep the work flooded. The ladders:
Sanded glass comes out frosted, not clear — that is the paper working correctly. Clarity returns only at the polishing stage, with a compound like cerium oxide on a felt pad. RMC's waterproof abrasive paper is silicon carbide on latex-treated paper, built for exactly this wet process.
Glass sits around 5.5 on the Mohs hardness scale; silicon carbide ranks about 9 — close to diamond, and hard enough to cut glass cleanly. Its grains are also sharp and friable: as each grain dulls it fractures, exposing a new cutting edge. Aluminum oxide, the workhorse grain on woodworking paper, is harder than glass but blunts and skids instead of shearing, which is why standard workshop sandpaper chatters and chips glass.
The water is not optional, for two reasons. First, dry sanding leaves sharp glass powder on the surface, and the paper grinds that powder back into the work — the scratches you just removed come right back. Second, friction heat builds fast on glass, and a hot spot on a cold edge is how chips and cracks start. A steady stream or a drip of water flushes the swarf and keeps temperature flat.
This is the same mechanism that makes wet paper the standard on paint and metal — how water sandpaper works explains the flushing principle in detail.
Work the edge through the ladder in order; each stage must erase the scratches of the one before it.
| Stage | Grit | What it should leave |
|---|---|---|
| 1. Break the sharp edge | 120 | A safe, slightly rounded bevel; coarse scratches are expected and fine |
| 2. Refine the bevel | 220 | The 120 scratches removed; a uniform matte band along the edge |
| 3. Smooth | 400 | No visible scratches from stage 2; the edge feels smooth, not sharp |
| 4. Pre-polish | 800 | A fine, even satin surface with no deep marks |
| 5. Polish-ready | 1000–1500 | A fine haze that polish compound can bring to gloss |
Stop-point check: wet the edge and look at it under raking light. Any scratch that survives a stage means that stage is not finished — moving up early costs more time than staying put. A glass edge is safe to touch from stage 3 onward, and optically clear only after polishing compound, never from paper alone.
| Goal | Grit sequence | Result |
|---|---|---|
| Light frosting / kitchen-safe texture | 220 → 400 | Uniform matte finish; frosting is the point, so stop here |
| Remove a visible surface scratch | Start one grade coarser than the scratch depth, then 400 → 800 → 1000 | Scratch gone; even haze remaining |
| Pre-polish a tabletop or panel | 400 → 800 → 1000 → 1500–2000 | Fine haze; ready for cerium oxide |
A uniform haze means the surface is done — it is not a sign of failure. The commonest first-timer error is judging the job at 800 grit and giving up, when another two stages and a polish would have cleared it. Frosting you want to keep (decorative etching) obviously should not be sanded at all; the ladder erases it permanently.
Four jobs should not touch sandpaper:
Where paper is the right tool, it reaches well beyond glass: the uses of waterproof abrasive paper cover paint, stone and metal on the same wet process.
Not reliably. Aluminum oxide paper on a paper backing skids on glass, loads with glass powder, and falls apart when you add water. Silicon carbide on a waterproof backing is the standard for exactly these reasons.
Because sanding leaves a uniform field of microscopic scratches that scatter light — that haze is the finish paper produces. It clears only at the polishing stage with cerium oxide or a similar compound on a felt pad.
Start one grade coarser than the scratch itself — a scratch you can catch with a fingernail needs 120–220 to level, then the full ladder up. A scratch you can only see needs 400 or finer to start. If you cannot feel or see it clearly, polish compound alone may do the job without sanding.
Avoid it. Dry work lets the cut powder scratch the surface and lets heat build at the edge — both cause the chips you are trying to prevent — and the airborne dust is hazardous. Wet is not slower in practice, because wet paper keeps cutting instead of loading.
Cerium oxide is the standard compound, worked on a felt pad with water, after the surface reaches 1000–2000 grit. Paper stops at the haze; compound is what returns clarity.

 English
 中文
 한국어
 français
 Deutsch
 Español
 italiano
 русский
 português
 العربية
 tiếng việt
 Polska