


Wet sanding car paint is clear coat work, and the ladder is short: P1500 to flatten orange peel, a dust nib or a run, P2000 to replace that scratch pattern, P2500 to P3000 when the panel goes straight to a polisher. Everything coarser is dry work — P80 to shape body filler, P150 to P180 to feather a repair edge, P320 before primer, P400 to P600 to level the primer itself. Use silicon carbide paper on a waterproof backing, keep the panel flooded with clean water, and treat the paint maker's data sheet as the final word whenever it disagrees with any grit chart. What follows is hand work on cured refinish, not fresh paint straight out of the booth.
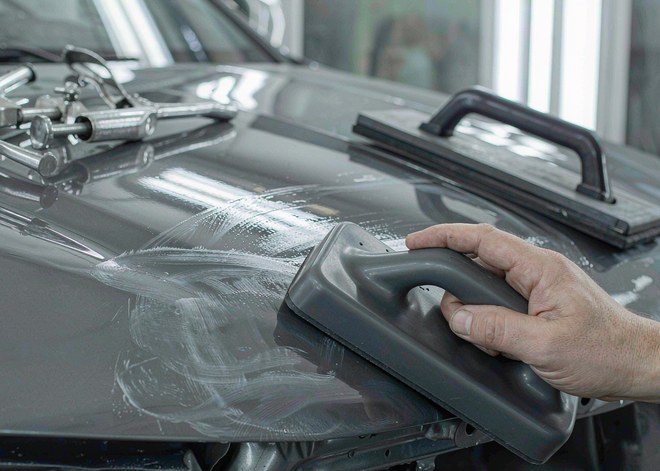
A cured clear coat is hard, thin and sensitive to heat. Dry paper loads within a few strokes as clear dust welds to the grain, and the friction heat that builds behind a loaded sheet softens the film until the paper is burnishing — pushing the surface around instead of cutting it. Water solves both at once: it flushes the swarf out from under the grain and holds panel temperature down, so every stroke cuts a shallow, even scratch instead of smearing a hot one.
The grain matters as much as the water. Silicon carbide crystals fracture as they dull, exposing fresh edges through a long wet pass, so the scratch pattern stays consistent from the first stroke to the last. That consistency is the point of the fine stages — a uniform P2000 pattern comes out in one compounding pass, while a mix of deep and shallow scratches sends you back down a grit. Aluminum oxide wet paper also exists and earns its place on primer and bare metal, where a slower, softer cut reduces the risk of cutting through; on clear coat the faster, finer-cutting silicon carbide is what lets you stop at P2000 rather than working down to P1500 and giving away film you cannot put back.
Every sheet has to be genuinely waterproof-backed, not just labeled wet and dry. A sheet that swells, curls at the edge or sheds grain after ten minutes in the bucket is a paper sheet, and no technique rescues it. RMC supplies silicon carbide waterproof paper in latex and kraft-backed grades for this work; if you are still deciding when the water setup pays for itself, wet sandpaper vs dry covers where each method wins.
| Stage | Grit | Wet or dry | What the step does |
|---|---|---|---|
| Shaping body filler | P80 | Dry, long block | Sets the contour; a short pad follows every dip you are trying to remove |
| Feathering repair edges and chips | P150–P180 | Dry | Blends the repair edge into the surrounding paint |
| Final sand before primer | P320 | Dry | Leaves an even scratch the primer can fill |
| Leveling primer | P400–P600 | Dry or wet | P600 is the safe default under base coat |
| Scuffing for a blend | P600–P800 | Wet | Dulls the old paint so new clear bonds to it |
| Clear coat defects | P1500–P2000 | Wet | Levels orange peel, nibs and runs |
| Refining before polish | P2500–P3000 | Wet | Shortens compounding to a single pass |
Enter cured clear at P1500 for ordinary orange peel and dust nibs. Step down to P1000 or P1200 only for a heavy run on fresh paint with film to spare, and treat P800 on clear as a last resort for severe texture — it removes material faster than most people expect, and a burn-through to base coat means a respray. On the other side of the scale, P2500 and P3000 are not vanity grits: they cut compounding time on a whole panel and make a DA polisher viable where a rotary would otherwise be needed.
Two product notes are worth having. Mid grits from P60 to P1000 are covered by RMC's 1000 grit wet sandpaper and coarser grades in the same kraft-backed C34P line. The fine end — P1500 through P5000 — comes from the CP38 line, which is where a full clear coat correction should be finishing. Both are resin-over-resin bonded on C-weight paper, and both are stocked in sheets, rolls and discs.
If your P numbers and someone else's grit numbers keep disagreeing, that is the P (FEPA) and CAMI scales talking, not a supplier error. abrasive paper grades explains the conversion.
Each stage has a visible end state, and moving on early wastes the next sheet. On filler, sand until the shape is right and the surface feels even under the flat of your hand. On primer, use a guide coat: a light mist of contrast color or a powder coat, sanded until it disappears evenly. Guide coat left in low spots is the clearest signal you have that the panel is not level yet, and it costs nothing compared with paint that shows waves later.
Most wet sanding car paint problems are decided here, between grits rather than at the paper: a panel judged while wet, or judged under the wrong light, gets a stage it did not need. On clear coat, work each grit until the previous scratch pattern is completely gone. Sand at a slight angle to the direction of the previous pass so the old scratches stay visible against the new ones; straight-line passes in the same direction hide the evidence. Check with a raking light held low across the panel, then rinse and dry the area before judging — water sitting on the surface fills scratches and makes a half-done panel look finished.
Sanding ends at one uniform haze with no deep lines under raking light. Past that point each pass removes clear you cannot replace. Cut the haze with a compound on a foam pad, then polish to restore gloss, and wipe the panel down between steps so polish residue does not mask a defect you will find again under the sun.
If a defect needs P1000 or coarser after the first correction, stop and look at how much film is left before touching it again. Repeated coarse corrections in one spot are how panels get burned through, and a spot repair costs more than the extra polishing time would have.
The same wet-sanding logic applies to other resin surfaces, but the entry grit changes with the material — wet sanding gelcoat starts much coarser because the resin layer is thicker, and stops at a different point.
In a base/clear system, no. Base coat is sprayed thin and then buried under clear; wet sanding it usually creates texture or adhesion problems that the clear will show. Single-stage paint is the exception — it is its own topcoat and can be sanded after full cure. The paint maker's data sheet decides either way.
There is no universal interval, and guessing is how soft paint gets ruined. Refinish clear needs its full bake and the cure time stated on the technical data sheet before it will sand cleanly. If the maker publishes no sanding window, sand a test panel sprayed at the same time rather than the customer's car.
Start at P1500 wet for typical orange peel, refine at P2000, then compound. Light texture can start at P1200 and heavy texture at P1000, but each step down costs clear film. If orange peel needs anything coarser than P800 on clear, the panel is usually a repaint rather than a sanding job.
P1500 is a FEPA grade; 1500 without the P is a CAMI grade. They are close but not identical, and mixing the two systems across a sequence is one reason a scratch pattern fails to clear. Pick one scale and stay on it from the first grit to the last.
Yes — silicon carbide grain on a waterproof backing, sold as wet-and-dry paper. Ordinary woodworking paper absorbs water, swells and sheds grain within a minute. Many shops buy it in rolls and tear off fresh sections, because a sheet worked past its life scratches deeper than the grit it claims to be.

 English
 中文
 한국어
 français
 Deutsch
 Español
 italiano
 русский
 português
 العربية
 tiếng việt
 Polska